This is such an easy project! It is a great way to update any room!
Can be used for kids bedrooms, living rooms, bathrooms, or laundry rooms!
*WARNING: FOR USE ONLY ON LIGHT SWITCHES, NOT ELECTRICAL OUTLET COVERS!!!
So let's get started!
Supplies you will need:
One: You will need to paint a light layer of Mod Podge on the face of the cover.
*tip* carefully pour a small amount of Mod Podge into the lid. For this project, you will only need just a little bit.
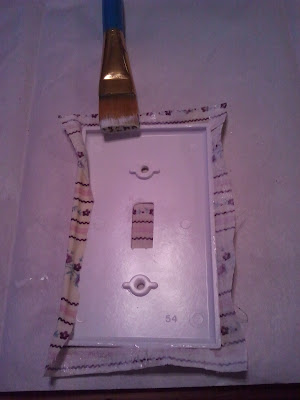
Two: Cut a small piece of fabric that will fit on the face of the cover, adding just enough on each side to overlap to the backside. Try to do this when the Mod Podge is still wet (it dries fast, so be quick!)
Three: After your fabric is placed the way you want and is gently smoothed down, flip it over and apply a little Mod Podge to the over hanging edges.
*tip* It is much easier to start with the sides and leave the corners for last.
Four: Press down the edges so they are smooth. Apply a dab of glue in the corners and pull the tip of the corner down and taught. Glue down. Use your fingers so smooth down the corners and edges. I applied a very light layer of Mod Podge to seal the raw edges of the fabric.
Five: Let it dry. When dried completely, cut a capital "Y" shape on the top and bottom of the inner rectangle with your knife. The bottoms of the "Y" 's should be connected in the middle. Pull the flaps you created to the back of the plate and glue down. Cut the holes for the screws as well.
...aaaaand done! After you let your work dry, install it back on your light switch.
Please comment if you liked this tutorial! :D
The man wanted one too so I used the leftover fabric I had from a pillow I made him. It matches! Yay!
*for personal use only please*


No comments:
Post a Comment